
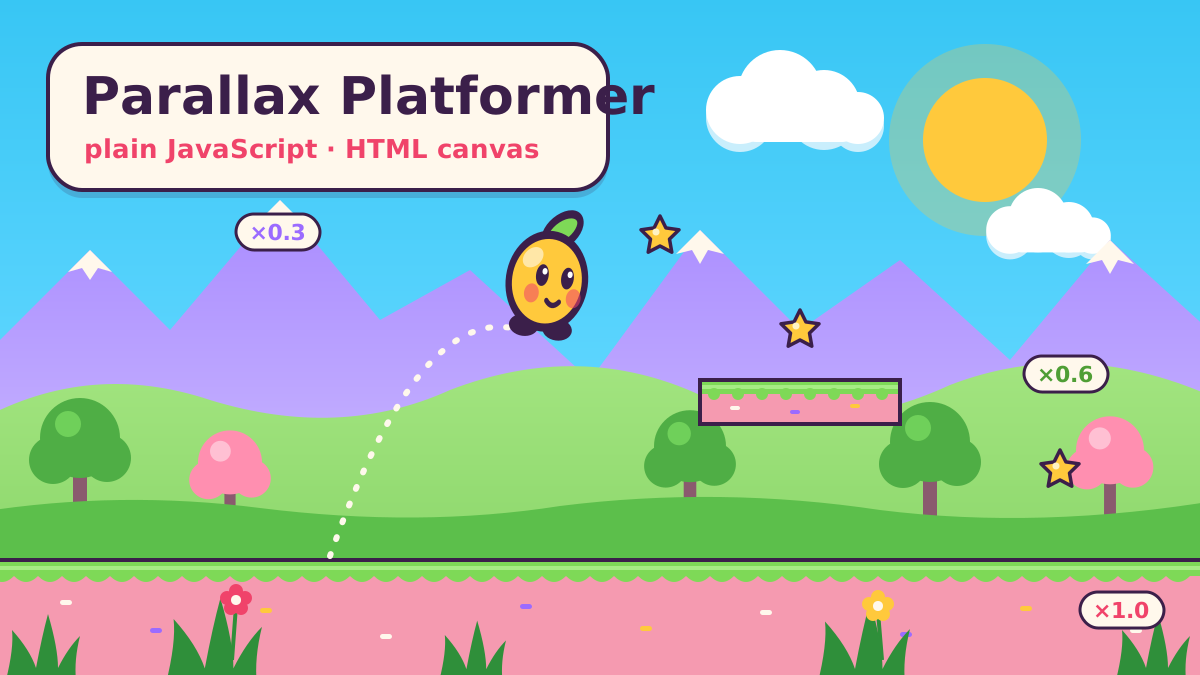
Few tricks make a 2D game feel deep as fast as parallax scrolling: distant mountains drift slowly, nearby trees rush past, and suddenly a flat screen has depth. In this devlog we build a small side-scrolling platformer with nothing but an HTML <canvas> and plain JavaScript. No engine, no libraries, no image files. Everything you see, from the sky to the round little hero, is drawn with canvas paths.
We will cover the parts that make it feel good to play, not just look good: a fixed-timestep game loop, layered parallax backgrounds that tile forever, player physics with acceleration, friction, variable jump height, coyote time and jump buffering, tile collision, a smooth camera, crisp rendering on HiDPI screens, and touch controls. Try it first:
Two buttons in the corner are there to help you learn. Parallax: off sets every layer's factor to 1, so the whole scene moves like one flat painting. Show layers labels each layer with its factor and draws a dashed line where each copy of a layer meets the next. Toggle them while you run and watch what changes.
The game loop: fixed timestep, smooth rendering
requestAnimationFrame fires once per display refresh, which might be 60 Hz on one monitor, 120 Hz on another, and anything at all when the browser is busy. If you move the player by velocity * dt with whatever dt you get, jumps reach slightly different heights on different machines and collisions get flaky when a frame takes too long.
The fix is the classic accumulator loop: add real time to a bucket, then run physics in fixed slices (here 1/120 s) until the bucket is nearly empty. The leftover fraction becomes an interpolation factor, so rendering stays smooth even when physics and refresh rate don't line up.
const STEP = 1 / 120;        // fixed physics timestep (seconds)
const MAX_FRAME = 0.1;       // clamp long frames (tab switches, breakpoints)

function frame(now) {
  if (!running) return;
  let dt = (now - last) / 1000;
  last = now;
  if (dt > MAX_FRAME) dt = MAX_FRAME;      // never simulate a huge catch-up
  acc += dt;
  while (acc >= STEP) { update(STEP); acc -= STEP; }
  render(acc / STEP);
  rafId = requestAnimationFrame(frame);
}
The clamp matters more than it looks. Switch tabs for ten seconds and come back: without it, the loop would try to simulate ten seconds in a single frame, and your player would tunnel straight through the floor. Each update also stores the previous position, and render(alpha) draws at lerp(previous, current, alpha).
The loop also stops entirely when nobody can see it: a visibilitychange listener pauses it when the tab is hidden, and an IntersectionObserver on the canvas pauses it when the embedded demo scrolls out of view. That is polite to laptop batteries, and on resume the clamp above keeps the first frame sane.
Parallax: one number per layer
The whole effect comes down to one idea. Each background layer has a parallax factor. When the camera moves camera.x pixels, a layer moves camera.x × factor. Factor 0 never moves (the sky). Factor 1 moves exactly with the world (the ground you stand on). Anything between reads as "far away", and a factor above 1 reads as "closer than the player", which makes a great foreground.

The demo uses sky ×0, clouds ×0.15, mountains ×0.3, hills ×0.6, trees ×0.8, the play layer ×1.0 and a grassy foreground ×1.3. The level is 4000 px wide, but the background art doesn't have to be. Each layer draws exactly one period of scenery (say 1100 px of mountains), and we repeat it across the screen with a modulo:
function drawLayer(L, camX, camY) {
  const f = parallaxOn ? L.factor : 1;
  const scroll = camX * f - (L.drift ? time * L.drift : 0);
  const shift = ((scroll % L.period) + L.period) % L.period;   // always 0..period
  const ty = layerY(f, camY);
  for (let x = -shift - L.period; x < viewW; x += L.period) {
    ctx.save();
    ctx.translate(x, ty);
    L.draw(ctx);
    ctx.restore();
  }
}
A few details worth stealing:
- The double modulo. In JavaScript,
-30 % 1000is-30, not970. Adding the period and taking the modulo again keepsshiftin range even when the scroll value is negative, like clouds drifting on their own. - Start one period early. The loop begins at
-shift - period. A cloud or tree near the right edge of one copy spills into the next copy, so drawing the copy just off-screen on the left keeps those overhanging bits from popping in. - Make the art seamless. Ridges are built from a height array that wraps around: the point after the last one is the first one again, so the end of one copy meets the start of the next perfectly. Turn on Show layers in the demo and try to spot the seams without the dashed lines.
Vertical camera movement gets the same treatment: layerY multiplies the camera's vertical offset by the factor, so jumping up to a high platform makes the far mountains sink a little rather than a lot.
Player physics that feel good
Moving the player at a fixed speed whenever a key is down works, but it feels stiff. Real-feeling movement has acceleration (you ramp up to full speed) and friction (you slide to a stop). Turning around adds both together, which gives a snappy change of direction without making the character twitchy.
const dir = (input.right ? 1 : 0) - (input.left ? 1 : 0);
if (dir !== 0) {
  let a = p.onGround ? PHYS.accel : PHYS.airAccel;
  if (p.vx * dir < 0) a += p.onGround ? PHYS.friction : PHYS.airFriction; // snappy turn-around
  p.vx = clamp(p.vx + dir * a * dt, -PHYS.maxRun, PHYS.maxRun);
  p.face = dir;
} else {
  const f = (p.onGround ? PHYS.friction : PHYS.airFriction) * dt;
  p.vx = Math.abs(p.vx) <= f ? 0 : p.vx - Math.sign(p.vx) * f;
}
Air control is deliberately weaker than ground control, so a jump commits you to a direction while still letting you adjust it.
Variable jump height
Players expect a tap to give a small hop and a long press to give a full jump. The cleanest way is not to cut the jump short, but to make gravity heavier while the player is still rising and the button has been released. In the demo that is a single line: g = (p.vy < 0 && !input.jump) ? gravity * 3 : gravity. The arc stays smooth either way, and a maxFall cap on falling speed keeps long drops readable.
Coyote time and jump buffering
These two forgiving timers are why some platformers feel "tight" and others feel unfair. Coyote time (named after the cartoon coyote who runs off a cliff and hangs in the air for a moment) lets you jump for a short time after walking off a ledge. Jump buffering remembers a jump press that came a little too early, just before landing, and performs it the moment your feet touch the ground.

Both are just countdowns, and a jump happens only when both are still running:
p.coyote = p.onGround ? PHYS.coyoteTime : p.coyote - dt;   // 0.10 s
p.buffer = input.jumpPressed ? PHYS.bufferTime : p.buffer - dt; // 0.12 s
input.jumpPressed = false;

if (p.buffer > 0 && p.coyote > 0) {
  p.vy = -PHYS.jumpSpeed;
  p.buffer = 0; p.coyote = 0; p.onGround = false;
  p.sx = 0.75; p.sy = 1.3;                       // stretch on take-off
}
Note that jumpPressed is set once on the keydown event, separate from the held jump state. Otherwise holding Space would make you bunny-hop forever. The last line is a little squash and stretch: the character stretches tall on take-off, squashes wide on landing, and eases back to normal every step. It is a few lines of code and adds a lot of charm.
Tile collision: one axis at a time
The level is a grid of 40 px tiles stored in a Uint8Array. The player is an axis-aligned bounding box (AABB). The trick that keeps collision simple and robust is to move and resolve each axis separately: move horizontally, push out of any wall, then move vertically and push out of any floor or ceiling. Because you know which axis you just moved, you always know which way to push.
function collide(b, axis) {
  const c0 = Math.floor(b.x / TILE), c1 = Math.floor((b.x + b.w - 0.001) / TILE);
  const r0 = Math.floor(b.y / TILE), r1 = Math.floor((b.y + b.h - 0.001) / TILE);
  for (let r = r0; r <= r1; r++) {
    for (let c = c0; c <= c1; c++) {
      if (!solidAt(c, r)) continue;
      if (axis === 'x') {
        if (b.vx > 0) b.x = c * TILE - b.w;
        else if (b.vx < 0) b.x = (c + 1) * TILE;
        b.vx = 0;
      } else {
        if (b.vy > 0) { b.y = r * TILE - b.h; b.onGround = true; }
        else if (b.vy < 0) b.y = (r + 1) * TILE;
        b.vy = 0;
      }
    }
  }
}

// in update():
p.x += p.vx * dt; collide(p, 'x');
p.onGround = false;
p.y += p.vy * dt; collide(p, 'y');
Only the tiles under the box are checked, so the cost doesn't depend on the size of the level. The small 0.001 keeps a box that is exactly flush with a tile edge from counting the neighbouring tile. And because the step is fixed at 1/120 s, even the maximum fall speed moves the player less than a quarter of a tile per step, so we never skip through a thin platform.
solidAt treats columns outside the level as walls and rows below it as empty, which gives us invisible side walls and bottomless pits for free. Fall into a pit and you respawn on the last ground you stood on.
A camera that doesn't make you seasick
Locking the camera to the player's position shakes the whole world with every tiny movement. Two small ideas fix that. A dead zone in the middle 20% of the screen lets the player move freely without moving the camera. Once the player leaves it, the camera eases toward its target instead of snapping.
function cameraTarget() {
  const pcx = player.x + player.w / 2, pcy = player.y + player.h / 2;
  let tx = cam.x;
  const left = cam.x + viewW * 0.4, right = cam.x + viewW * 0.6;   // dead zone
  if (pcx < left) tx = pcx - viewW * 0.4;
  else if (pcx > right) tx = pcx - viewW * 0.6;
  const ty = pcy - viewH * 0.6;
  return { tx, ty };
}

function updateCamera(dt) {
  cam.px = cam.x; cam.py = cam.y;
  const { tx, ty } = cameraTarget();
  // frame-rate independent smoothing: same feel at any step size
  cam.x = lerp(cam.x, tx, 1 - Math.exp(-8 * dt));
  cam.y = lerp(cam.y, ty, 1 - Math.exp(-4 * dt));
  clampCamera();
}
1 - Math.exp(-k * dt) is the frame-rate-independent version of the common lerp(a, b, 0.1). It closes the same share of the gap per second no matter how often it runs. Vertical smoothing is slower than horizontal, so small hops don't bob the horizon. Finally, clampCamera keeps the view inside the level, so you never see past the edges of the world.
Crisp on every screen
A canvas has two sizes: the CSS size it takes up on the page and the number of pixels in its backing store. On a Retina screen, a 1000 px wide canvas with a 1000 px backing store gets stretched and looks blurry. So we size the backing store by devicePixelRatio, capped at 2 because 3× phones gain little visually and pay for every extra pixel:
function resize() {
  cssW = canvas.clientWidth || window.innerWidth;
  cssH = canvas.clientHeight || window.innerHeight;
  dpr = Math.min(window.devicePixelRatio || 1, 2);
  canvas.width = Math.round(cssW * dpr);
  canvas.height = Math.round(cssH * dpr);
  // Fit VIEW_H world units to the screen height, unless that makes the view too narrow.
  scale = Math.min(cssH / VIEW_H, cssW / MIN_VIEW_W);
  viewW = cssW / scale;
  viewH = cssH / scale;
}

// every frame, draw the world in world units:
ctx.setTransform(dpr * scale, 0, 0, dpr * scale, 0, 0);
All game code then works in world units, independent of the screen. The view shows about 440 units of height, and wider screens simply see more of the level. On tall portrait phones the view is limited by width instead, so the hero doesn't shrink to a dot.
Touch controls that don't hijack the page
The demo lives inside an article, so it has to be a good guest. Keyboard handling only calls preventDefault on game keys, and only receives them when the frame has focus, so arrow keys and Space still scroll the article normally. On touch devices, three HTML buttons appear. Only those buttons use touch-action: none; the canvas leaves touches alone, so swiping over the game still scrolls the page.
for (const btn of document.querySelectorAll('.touch button')) {
  const k = btn.dataset.key;
  const up = () => { btn.classList.remove('on'); press(k, false); };
  btn.addEventListener('pointerdown', (e) => {
    e.preventDefault();
    btn.setPointerCapture(e.pointerId);
    btn.classList.add('on');
    press(k, true);
  });
  btn.addEventListener('pointerup', up);
  btn.addEventListener('pointercancel', up);
  btn.addEventListener('lostpointercapture', up);
}
Pointer capture plus the cancel and lost-capture handlers mean a thumb that slides off the button, or a system gesture that steals the touch, never leaves the player running forever. Each button tracks its own pointer, so you can hold right and tap jump at the same time.
Where to go next
The whole demo is a single dependency-free HTML file, so open it full screen and read the source. Some natural next steps:
- One-way platforms that you can jump up through: only resolve the vertical collision when falling and when the player's feet were above the platform on the previous step.
- Camera look-ahead: shift the camera target a little in the direction the player faces, so you see more of what's coming.
- Pre-rendered layers: for heavier art, draw each layer's period once into an offscreen canvas and blit it with
drawImage. Keep an eye on memory, because a full-height layer at 2× DPR adds up fast. - Tune by feel: every number in the
PHYSobject is a design choice. HalvecoyoteTime, doublelowJumpMult, and play each version for a minute. You will feel the difference right away.
Parallax is the part people notice first, but the forgiving timers, the eased camera and the fixed timestep are what make a platformer feel good to play. They are all just a few lines of plain JavaScript.


Comments
Loading comments…